What is the Repository Layer?
This is a lightweight layer which has only one responsibility – perform queries on a database (in our case, H2). It should not contain any custom business logic as its only purpose is to manipulate a database.
What is the JPA and Why Should it be Used?
The Java Persistence API (JPA) is a set of interfaces and classes that help us store our data in relational databases, whether that is H2, MySQL etc. We can pass Entity objects to the Repository Layer and JPA will perform your database operations.
One of the interfaces that JPA provides for us is the Crud Repository. Fortunately, JPA also provides an implementation class for this interface, which interacts with an Object Relational Mapper (ORM) called Hibernate.
Hibernate is used to establish a connection to the database based on our configuration, and then it will handle custom database operations. The benefits of this is that it reduces the amount of boilerplate JDBC code that needs to be written, as it is all handled for the service.
Within the Crud Repository interface, custom queries can also be defined. Spring Data JPA is clever enough to create implementations of these methods declared at runtime. 😮 Just think about that for 1 second… JPA literally generates implementations of our code ON THE FLY and can perform queries… that’s freakin’ mad! 🤯
The Repository Layer
Let’s leverage the powers of JPA and create the Repository Layer.
Create a new package called respository. Then create the Reservation Respository interface and within here, extend the Crud Repository interface.
@Repository
public interface ReservationRepository
extends
CrudRepository<ReservationEntity, String> {}
@Repository – This is a Spring annotation which indicates that the Reservation Repository interface will be used for database operations.
@Repository is also a Spring Component, which we can inject into other Spring Components which we will be created later. If you are not familiar with the concept of autowiring, I will be making a guide on how this works in more detail soon.
CrudRepository – This provides functionality to perform CRUD operations on the ReservationEntity object in the database. The CRUD methods are provided to us by the Crud Repository interface and its basic implementation is provided by the Simple Jpa Repository class. Therefore, we do not need to provide our own implementation unless very complex queries are to be performed.
If you have had any trouble with this, fork the project and checkout branch part-2-creating-repository-layer and compare your code against mine.
Configuring the Database
Now that the Reservation Entity and the Reservation Repository have been created, the database needs to be configured.
Open application .properties and copy and paste the following properties:
# url to connect to the database: testdb
spring.datasource.url = jdbc:h2:mem:testdb

# Verify that a valid Driver class is
# available. In our case, the h2 driver.
spring.datasource.driverClassName =
 org.h2.Driver

spring.datasource.username = sa
spring.datasource.password = password

# Name of the target database to operate on,
# auto-detected by default
spring.jpa.database-platform =
   org.hibernate.dialect.H2Dialect

# Enables the web UI so we can interact
# with the database directly.
spring.h2.console.enabled = true
You can now override Spring Boot datasource properties in order to connect to your database.
Once you have included these properties in the application .properties file, start the application up using the gradle wrapper command:
./gradlew bootRunBy default, the application will start up on port 8080, and since it is running on your local machine, go to
http://localhost:8080/h2-consoleHere, you will be presented with a database login page:
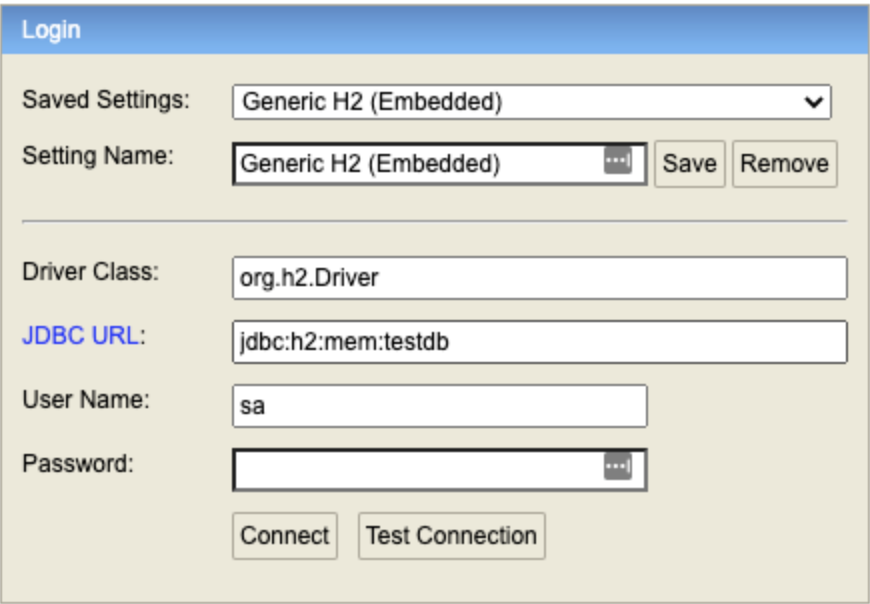
As you can see, some of the fields have already been pre-populated. Therefore, all you need to do is enter in the password provided in the application .properties file, and you will be logged in.
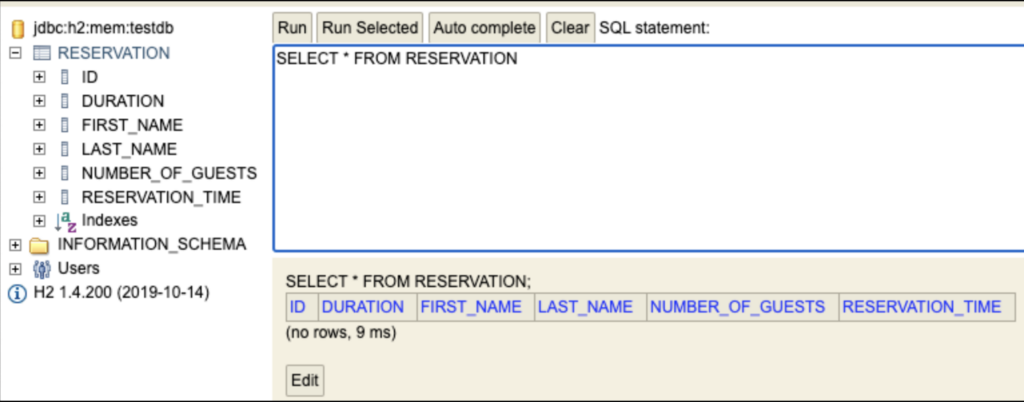
By using the @Entity and @Table annotations, the RESERVATION table was created automatically thanks to JPA and Hibernate. Pretty cool huh! 😎
You made to the end of Part 2! Good Job!🎉
You have just successfully connected to a database, and leveraged the powers of Spring Data JPA to let it handle all the boring boilerplate database stuff for you! How long did that take you?! not even 10 minutes! Imagine having to do all this yourself! Thank you Spring! 🙌🤘
If you have had any trouble with this, fork the project and checkout branch part-2-configuring-the-database and compare your code against mine.
In the next part of the series, we will create a domain object, which can be passed around the RMS. By doing this, it will help our layers to be more loosely coupled. Check out Part 3: Creating the Reservation Domain / Model Object.